 Dora cake, also known as Doraemon cake, is a type of cake that is inspired by the Japanese manga and anime character Doraemon. Doraemon is a blue robotic cat who has been popular in Japan and throughout the world since the 1970s.
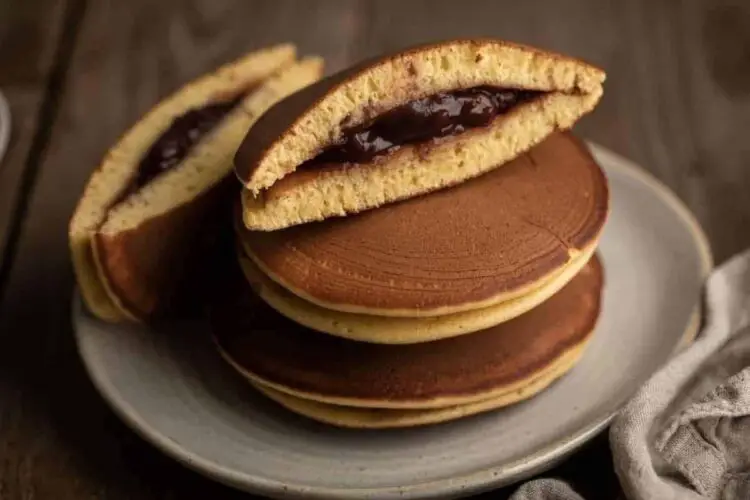
Dora cakes are usually made of sponge cake layers with a whipped cream filling and often feature a blue frosting or fondant coating to resemble Doraemon’s blue color. Some Dora cakes also have decorations on top that look like Doraemon’s face or other related designs.
In many parts of Asia, particularly in India and Bangladesh, where they are frequently served at birthday parties and other celebrations, Dora cakes are very popular. In recent years, many bakeries and home bakers have created their own versions of the cake, making them a popular trend.
Is it difficult to make a Dora cake?
No, making a Dora cake is not difficult, but it does require some time and effort. You will need to bake the cake layers, make the frosting, and decorate the cake with the Doraemon character design. With some practice and patience, you can make a beautiful and delicious Dora cake.
Ingredients for Dora cake
- 2 cups cake flour
- 1 1/2 cups granulated sugar
- 1/2 cup unsalted butter, at room temperature
- 4 large eggs, at room temperature
- 1 cup whole milk, at room temperature
- 2 teaspoons vanilla extract
- 2 teaspoons baking powder
- 1/2 teaspoon salt
- Blue food coloring
- Whipped cream for filling and frosting
- Doraemon-themed cake decorations (optional)
Instructions for Dora cake
- Preheat the oven to 350°F (180°C). Grease two 8-inch round cake pans and line the bottoms with parchment paper.
- In a large mixing bowl, cream together the butter and sugar until light and fluffy.
- Add in the eggs one at a time, mixing well after each addition.
- In a separate bowl, sift together the cake flour, baking powder, and salt.
- Gradually add the dry ingredients to the butter mixture, alternating with the milk and vanilla extract.
- Add blue food coloring until the batter reaches a desired shade of blue.
- Divide the batter evenly between the prepared cake pans.
- Bake for 25-30 minutes or until a toothpick inserted in the center comes out clean.
- Let the cakes cool completely before removing them from the pans.
- Spread a layer of whipped cream on one cake layer, then place the other cake layer on top.
- Frost the cake with whipped cream and decorate it with Doraemon-themed cake decorations (if desired).
- Enjoy your delicious Dora cake!
Serving suggestions
At birthday parties, Dora cakes are often served, especially to kids who love the Doraemon character. To create a fun and festive atmosphere, decorate the cake with candles and balloons, and streamers. You can also serve them as part of an afternoon tea spread. Cut the cake into smaller pieces and serve it with tea or coffee for a delightful treat.
Dora cakes are a great addition to any picnic or outdoor event because they are portable and easy to transport. Serve the cake with other snacks and beverages in a secure container.
In the event that you’re facilitating a get-together or gathering, consider setting up a pastry buffet with different sweet treats, including your Dora cake. Because of this, guests will be able to try a variety of desserts and enjoy a little bit of everything.
Tips
- Use a non-stick pan or a griddle to cook the pancakes. This will help prevent sticking and make it easier to flip them.
- Keep the pancake size consistent by using a measuring cup or ladle to pour the batter onto the pan. This ensures uniformity in the shape and size of the pancakes.
- Cook the pancakes on medium-low heat to ensure they cook through without burning. This allows the pancakes to develop a golden brown color and a fluffy texture.
- Flip the pancakes when small bubbles form on the surface and the edges start to set. This indicates that it’s time to flip and cook the other side.
- Avoid pressing down on the pancakes while cooking as this can make them dense. Allow them to cook naturally and rise to their fluffy texture.
- Once the pancakes are cooked, transfer them to a wire rack to cool. This helps maintain their texture and prevents them from becoming soggy.
Variations
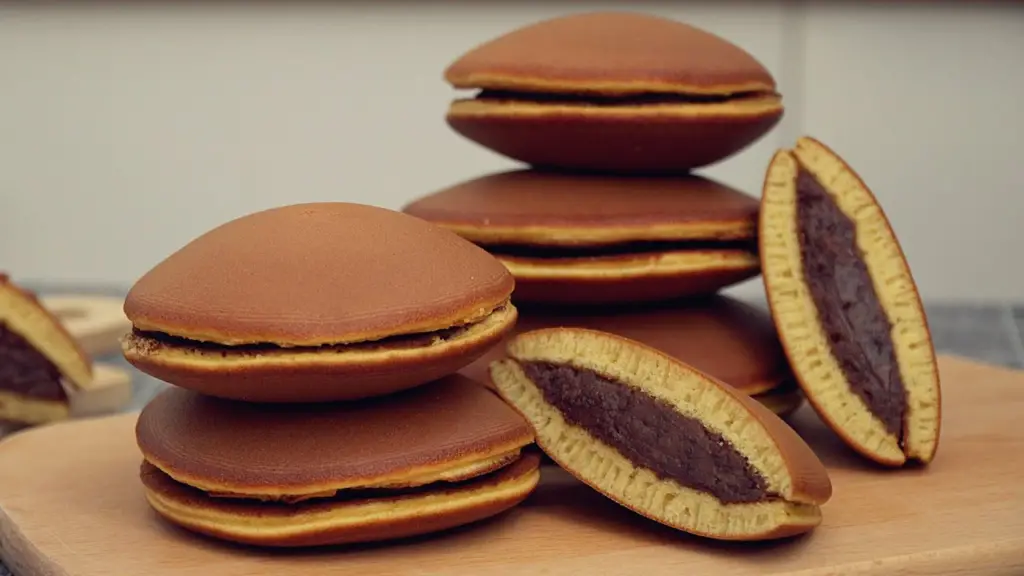
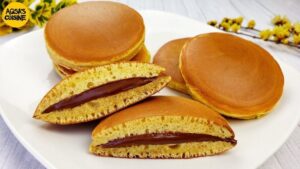
- Filling Options: While red bean paste (anko) is the traditional filling for Dora cakes, you can experiment with other fillings such as Nutella, peanut butter, fruit preserves, or even whipped cream. This allows you to customize the flavor and create your own unique combinations.
- Additions to the Batter: You can enhance the flavor of the pancakes by adding ingredients like vanilla extract, matcha powder, cocoa powder, or even grated citrus zest. These additions give the pancakes an extra twist and create different flavor profiles.
- Toppings and Garnishes: Sprinkle some powdered sugar or drizzle some chocolate sauce over the assembled Dora cakes for added sweetness and presentation. You can also top them with fresh fruits, nuts, or even a dollop of whipped cream to elevate the visual appeal and taste.
- Mini Dora Cakes: Instead of the traditional larger-sized Dora cakes, you can make smaller, bite-sized versions by using a smaller mold or cookie cutter. These mini Dora cakes are great for parties or as a cute dessert option.
FAQs
- Can I make a Dora cake without using blue whipped cream frosting?
Yes, you can make the cake with a different type of frosting if you prefer. Some people like to use buttercream frosting or fondant to decorate their Dora cake instead of whipped cream.
- Can I make a Dora cake in advance?
Yes, you can make it in advance. The cake layers can be baked a day or two in advance and stored in an airtight container at room temperature. The frosting can also be made in advance and stored in the refrigerator for up to three days. Assemble the cake and decorate it the day of the event.
- Can I use a store-bought cake mix?
Yes, you can use a store-bought cake mix if you prefer. Just follow the instructions on the cake mix box and then decorate the cake with the blue whipped cream frosting and Doraemon design as usual.
In Conclusion
Making a Dora cake that looks and tastes amazing is a rewarding experience. Follow our step-by-step guide, and you’ll have a show-stopping cake that will steal the spotlight at any celebration. Your guests, especially the little ones, will be delighted with the effort you put into bringing Dora the Explorer to life on their plates.
Nutrition:
| Calories | 1805.8kcal |
| Fat | 61.7g |
| Sodium |
484mg
|
| Potassium |
770mg
|
| Carbohydrates | 46g |
| Protein | 7g |
| Vitamin A |
84IU
|
| Calcium |
18mg
|
| iron | 0.2mg |
You Might Also Like:
- Bharwa mirch achar recipe
- Amrood (guava) ki Sabji recipe
- A Paneer Chili recipe
- Veg Pulao recipe
- Bajra paratha recipe
follow us on instagram, facebook and youtube