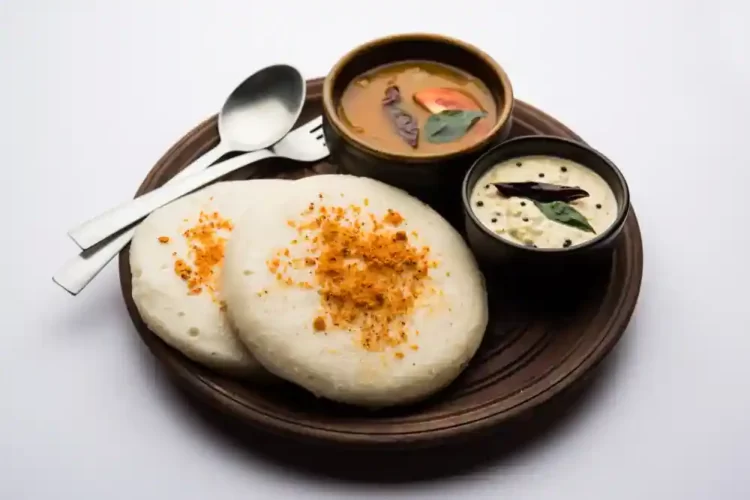
Thatte Idli, also known as plate idli, is a popular South Indian breakfast dish that originates from the state of Karnataka. It gets its name from the unique shape and size of the idlis, which are larger and flatter compared to regular idlis.
Thatte Idli is larger and flatter compared to the traditional round and fluffy Idlis. It is typically made using a fermented batter of rice and urad dal (split black gram). The batter is poured onto special metal plates or molds called “Thatte” and then steamed until cooked.
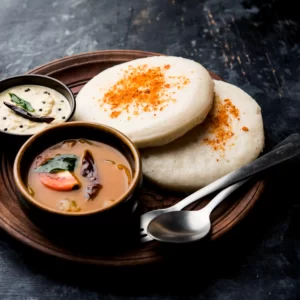
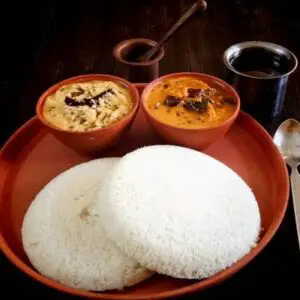
The distinctive shape of Thatte Idli allows it to cover a larger area of the plate, hence the name “plate idli.” The idlis are soft, spongy, and have a slightly tangy taste due to fermentation. They are usually served hot with coconut chutney, sambar (a lentil-based vegetable stew), and/or various chutneys.
Ingredients:
- 2 cups idli rice or parboiled rice
- 1 cup urad dal (split black gram)
- 1 teaspoon fenugreek seeds (optional)
- Salt to taste
- Water for soaking and grinding
Instructions:
- Wash the idli rice and urad dal separately and soak them in water. If using fenugreek seeds, add them to the urad dal while soaking. Soak the rice and dal for about 4-6 hours.
- After soaking, drain the water from the rice and dal. Keep the drained water aside for grinding.
- Grind the urad dal in a wet grinder or a blender. Add some of the drained water as needed while grinding to achieve a smooth and fluffy batter. The consistency should be thick yet pourable. Transfer the ground dal batter to a large bowl.
- Grind the soaked rice in batches to a slightly coarse texture. Again, add some of the drained water as needed. The rice batter should be slightly grainy but still smooth. Mix the rice batter with the urad dal batter in the bowl.
- Add salt to the batter and mix well. Cover the bowl with a clean cloth and let it ferment in a warm place for 8-10 hours or overnight. Fermentation is essential for soft and fluffy idlis.
- After fermentation, the batter would have risen and become frothy. Gently mix the batter to incorporate any settled air bubbles.
- Grease the Thatte Idli molds or plates with a little oil. Place them in a steamer with water and bring it to a boil.
- Pour a ladleful of the batter onto each mold, filling it halfway. The idlis will expand during steaming. Place the molds in the steamer and steam for about 10-12 minutes on medium heat or until the idlis are cooked through. You can insert a toothpick or knife into the idlis to check if they come out clean.
- Once cooked, remove the molds from the steamer and let them cool for a few minutes. Gently remove the idlis from the molds using a spoon or knife.
- Serve the Thatte Idlis hot with coconut chutney, sambar, and/or your favorite chutney. Enjoy the soft and fluffy idlis!
Tips for Thatte Idli:
- Fermentation: Proper fermentation is key to achieving soft and fluffy idlis. Ensure that the batter is left to ferment in a warm place for a sufficient amount of time, usually 8-10 hours or overnight. If the weather is cold, you can place the batter in the oven with the light turned on to create a warm environment.
- Consistency of Batter: The batter should be of the right consistency – thick yet pourable. If the batter is too thick, the idlis may turn out dense. If it is too thin, the idlis may become flat. Adjust the water quantity while grinding to achieve the desired consistency.
- Steaming: Steam the idlis on medium heat for about 10-12 minutes or until they are cooked through. Overcooking can result in dry idlis, while undercooking can lead to a sticky texture. Insert a toothpick or knife into the idlis to check if they are done. If it comes out clean, they are ready.
- Thatte Idli Plates: If you don’t have specific Thatte Idli plates, you can use small steel plates or shallow bowls as molds. Grease them well before pouring the batter.
Variations of Thatte Idli:
- Vegetable Thatte Idli: Add finely chopped vegetables like carrots, peas, beans, and bell peppers to the batter. This adds color, texture, and nutrition to the idlis. Steam them as usual.
- Masala Thatte Idli: Prepare a tempering with mustard seeds, urad dal, chana dal, curry leaves, and finely chopped onions. Mix this tempering into the batter before steaming. This variation adds a flavorful twist to the idlis.
- Rava (Semolina) Thatte Idli: Instead of using rice, use a combination of semolina (rava) and urad dal to make the batter. The rest of the process remains the same. Rava gives a slightly different texture to the idlis.
- Stuffed Thatte Idli: Make a small dent in the center of the idli batter in each mold and fill it with a spicy coconut or onion filling. Steam as usual, ensuring the filling is covered with the batter. This adds a delicious surprise element to the idlis.
FAQs
Q: Can I make Thatte Idli without special molds or plates?
A: If you don’t have the specific Thatte molds, you can still make Thatte Idli by using a flat plate or a shallow dish. Pour the batter onto the plate, spreading it evenly, and steam it until cooked. The idlis may not have the exact shape but will still be delicious.
Q: What is the ideal texture of Thatte Idli?
A: Thatte Idlis are known for their soft and fluffy texture. When properly steamed, they should be light, spongy, and have a slight tanginess from fermentation. The idlis should be cooked all the way through but still retain their moisture.
Q: What is the best accompaniment for Thatte Idli?
A: Thatte Idlis are commonly served with coconut chutney, sambar (a lentil-based vegetable stew), and/or a variety of chutneys like tomato chutney, mint chutney, or peanut chutney. Some people also enjoy them with ghee (clarified butter) or a drizzle of idli podi (a spicy condiment).
how to make thatte idli
Ingredients
- 2 cups idli rice or parboiled rice
- 1 cup urad dal (split black gram)
- 1 teaspoon fenugreek seeds (optional)
- Salt to taste
- Water for soaking and grinding
Instructions
- Wash the idli rice and urad dal separately and soak them in water. If using fenugreek seeds, add them to the urad dal while soaking. Soak the rice and dal for about 4-6 hours.
- After soaking, drain the water from the rice and dal. Keep the drained water aside for grinding.
- Grind the urad dal in a wet grinder or a blender. Add some of the drained water as needed while grinding to achieve a smooth and fluffy batter. The consistency should be thick yet pourable. Transfer the ground dal batter to a large bowl.
- Grind the soaked rice in batches to a slightly coarse texture. Again, add some of the drained water as needed. The rice batter should be slightly grainy but still smooth. Mix the rice batter with the urad dal batter in the bowl.
- Add salt to the batter and mix well. Cover the bowl with a clean cloth and let it ferment in a warm place for 8-10 hours or overnight. Fermentation is essential for soft and fluffy idlis.
- After fermentation, the batter would have risen and become frothy. Gently mix the batter to incorporate any settled air bubbles.
- Grease the Thatte Idli molds or plates with a little oil. Place them in a steamer with water and bring it to a boil.
- Pour a ladleful of the batter onto each mold, filling it halfway. The idlis will expand during steaming. Place the molds in the steamer and steam for about 10-12 minutes on medium heat or until the idlis are cooked through. You can insert a toothpick or knife into the idlis to check if they come out clean.
- Once cooked, remove the molds from the steamer and let them cool for a few minutes. Gently remove the idlis from the molds using a spoon or knife.
- Serve the Thatte Idlis hot with coconut chutney, sambar, and/or your favorite chutney. Enjoy the soft and fluffy idlis!
Nutrition
| Calories | 314kcal |
| Carbohydrates | 27g |
| Protein | 8g |
| Fat | 22g |
| Sodium | 1221mg |
| Potassium | 1085mg |
| Sugar | 10 g |
| Vitamin A | 1914IU |
| Calcium | 166 mg |
| Iron | 4 mg |
You Might Also Like:
- Paneer do pyaza recipe
- chicken chatpata recipe
- Oreo Mug Cake Recipe
- Paneer Dum Biryani Recipe
- Aloo paneer paratha recipe
